We are all familiar with Zoom by now, and you can improve your experience in a variety of ways, and even get quite fancy if you use external microphones and multiple cameras (that’s what I do!). However, there is one single setting that I believe is the most important one when it comes to online music-making and lessons: the turn on original sound setting. Let me show you how how to enable this feature.
Before we start, please make sure to have downloaded the Zoom client (app) by visiting zoom.us or from the app store if you are using a mobile device. Always check you are using the latest version to avoid any bugs.
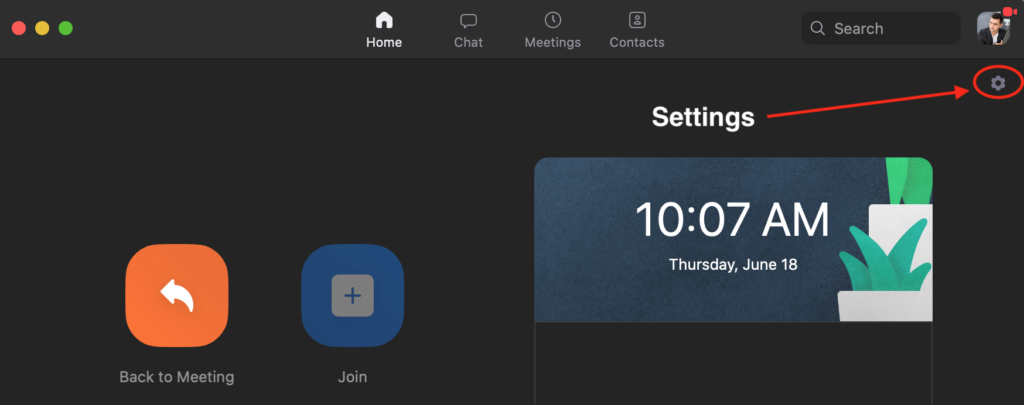
Step 1: Access your settings from the Zoom client.
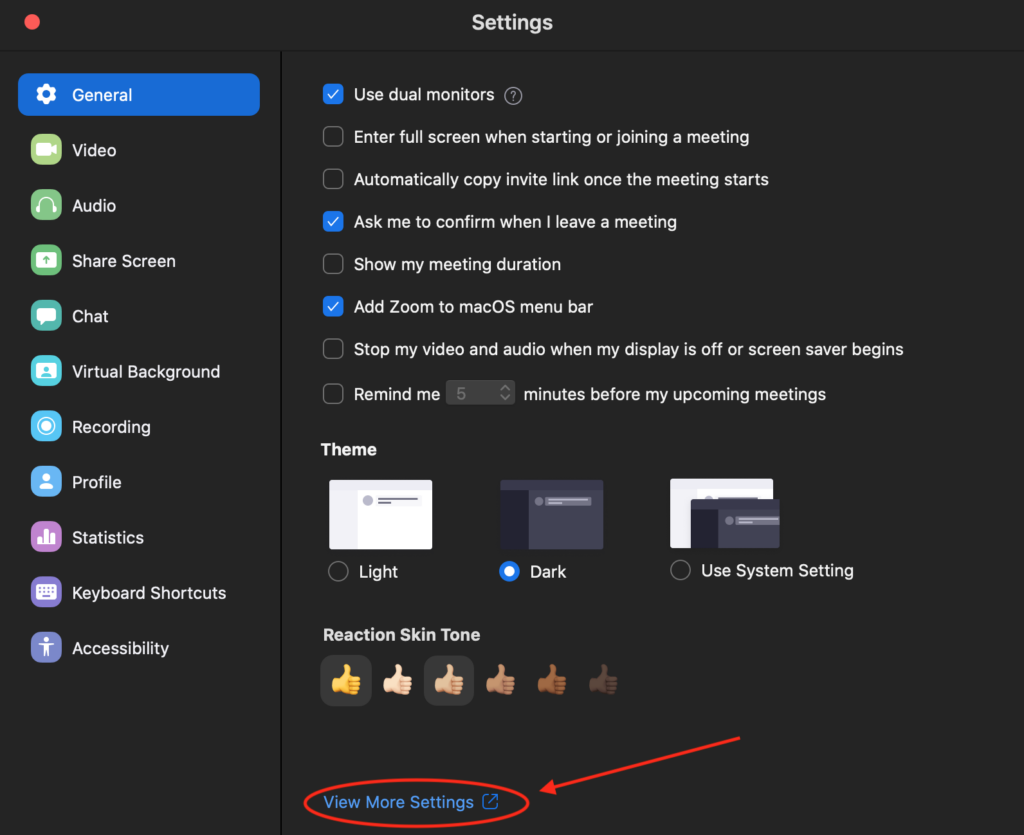
Step 2: Click on view more settings in order to access your account settings. (You will be asked to log in to your account, have your info handy).
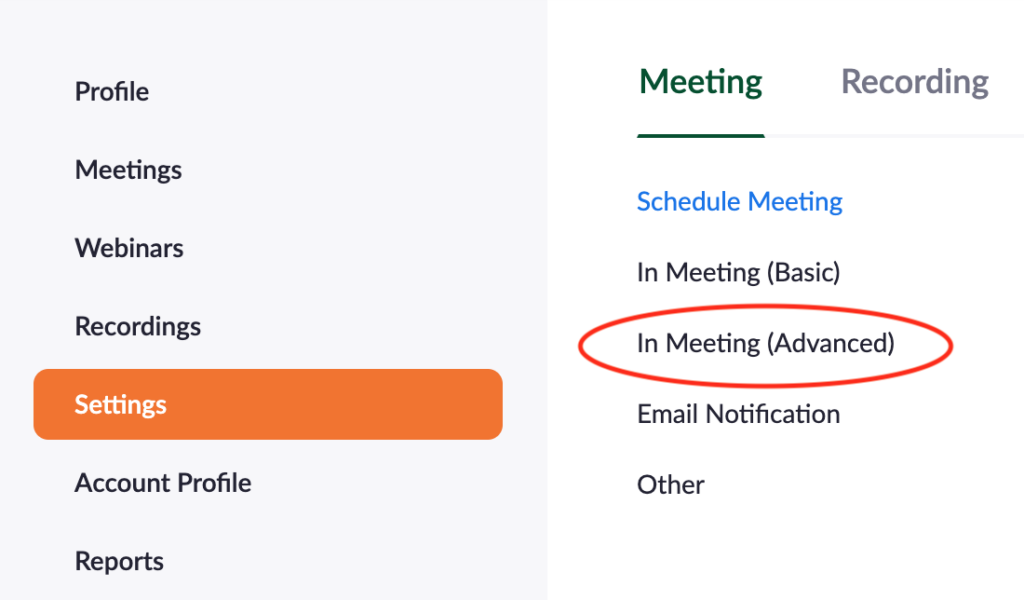
Step 3: Go to settings, and click on In Meeting (Advanced).
Step 4: Enable “Allow users to select original sound in their client settings.”

Step 5: Access your audio settings as we did in step 1, or by clicking on the Microphone icon.
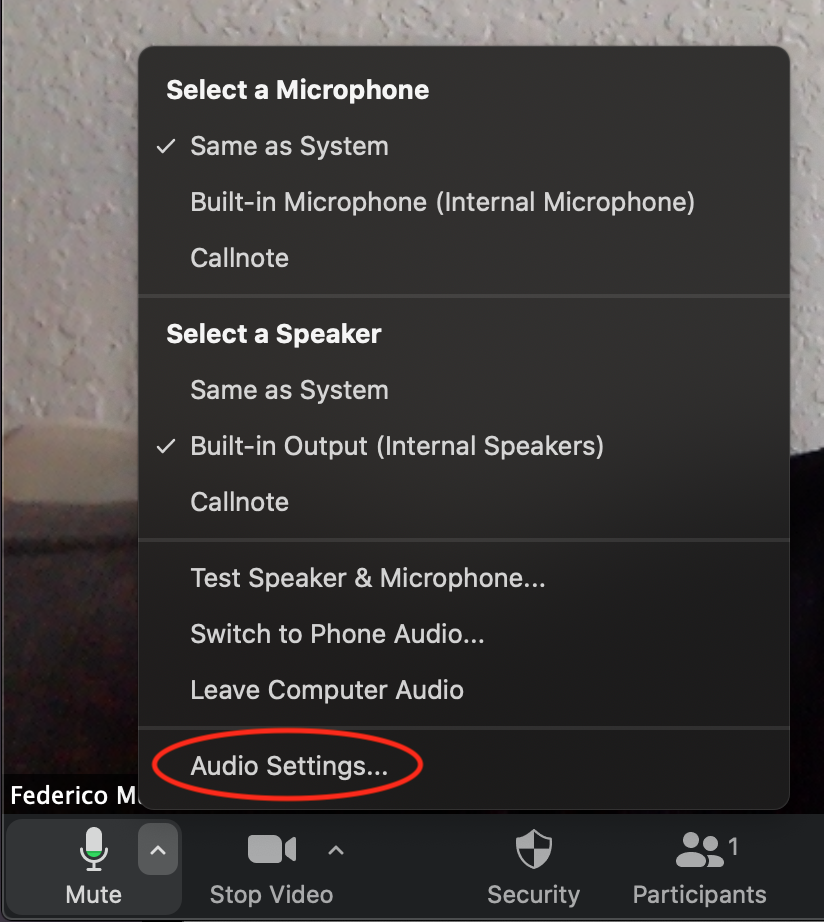
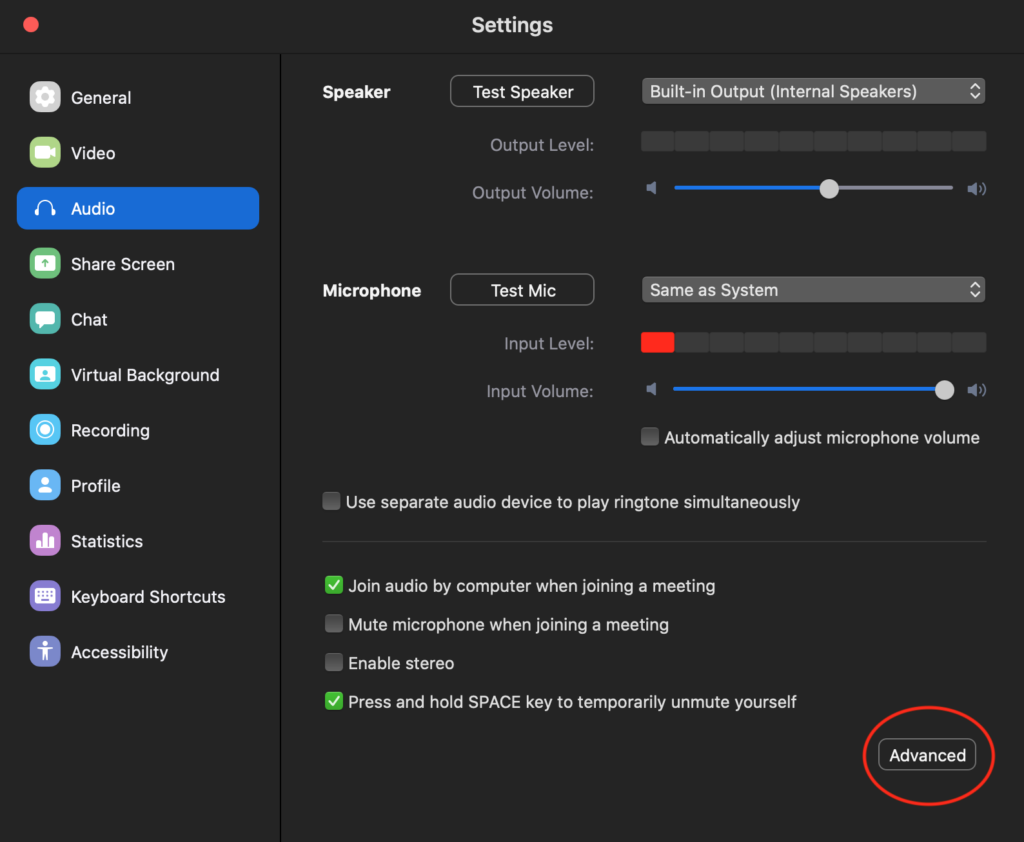
Step 6: Once inside audio settings, click on Advanced (we are almost done!).
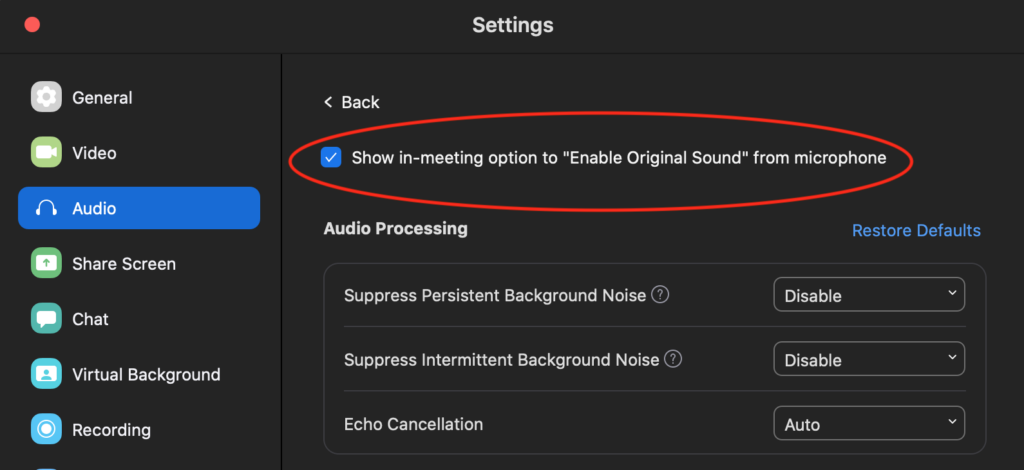
Step 7: Enable the show in-meeting option to “Enable Original Sound” from microphone. This is a good time to also disable the first two Background noise settings and turn Echo cancellation to Auto.
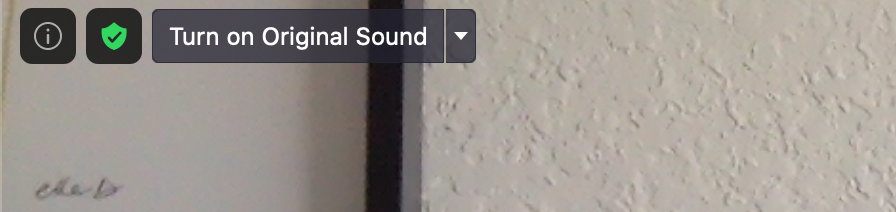
Step 8: (Final Step!) Click on Turn On Original Sound Button found on the top left of your screen. This button will only appear during a Zoom call.
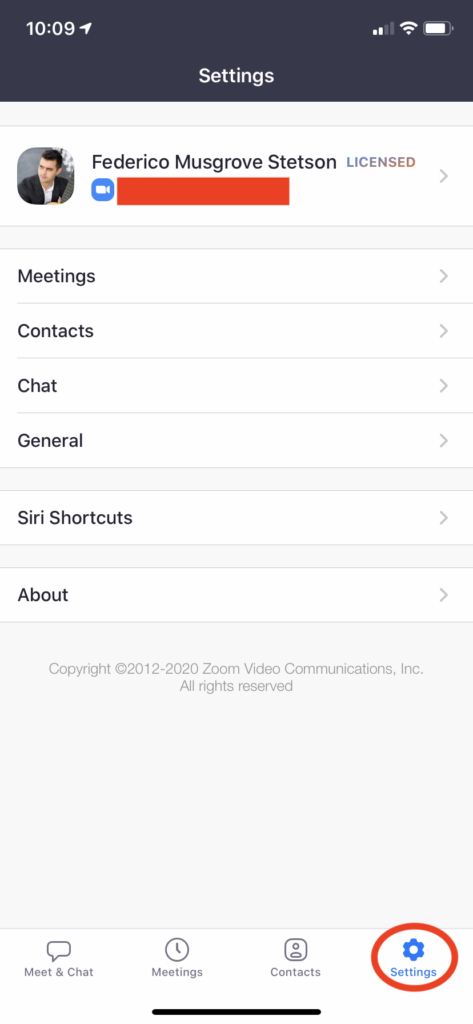
How to enable original sound from your iOS Device
Step 1: Open your Zoom App and go to settings.
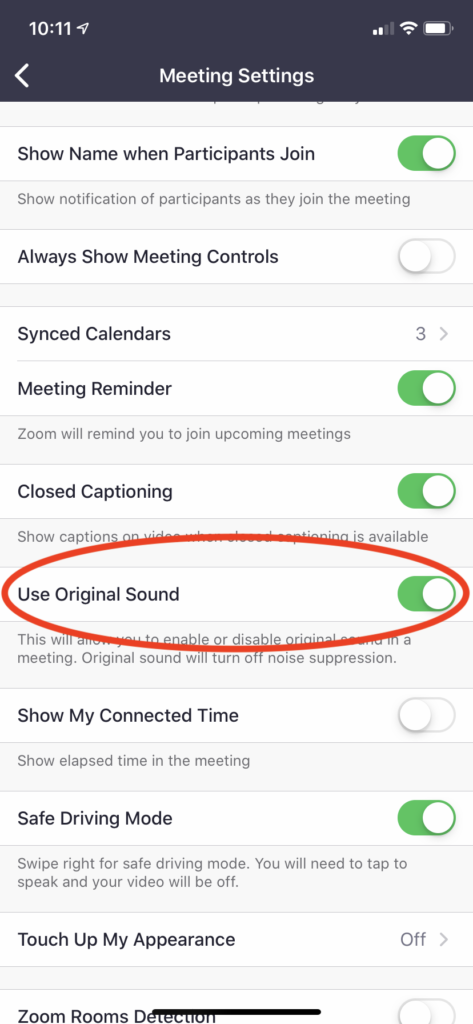
Step 2: Enable Use Original Sound in your Meeting Settings.
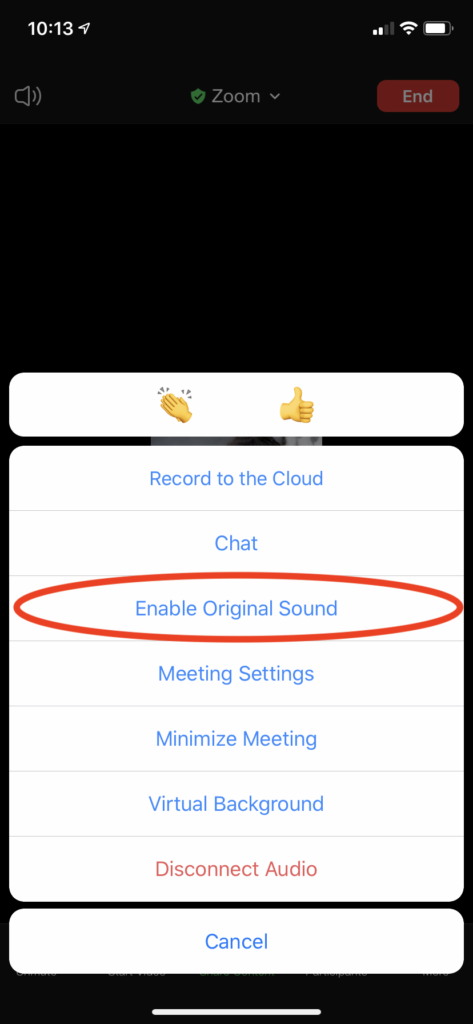
Step 3: During a Zoom call, click on More (bottom right corner).
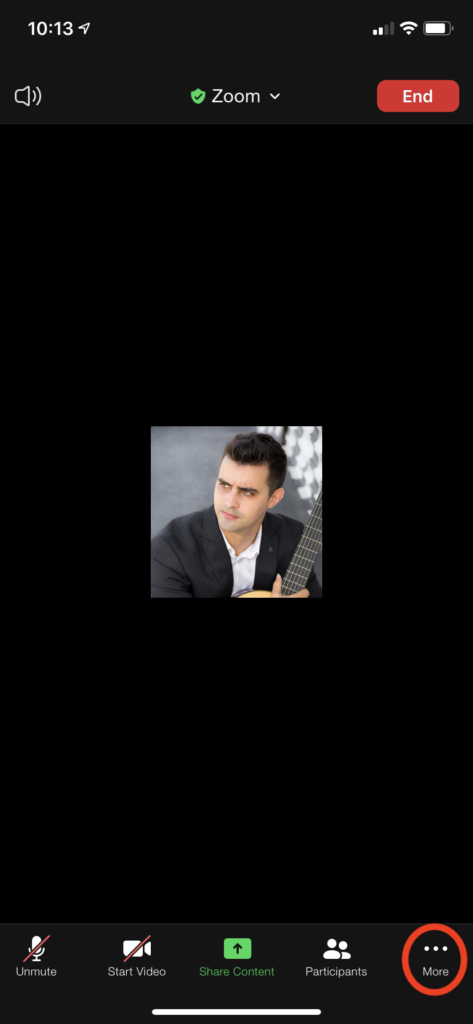
Step 4: Click on Enable Original Sound (You re done!).